
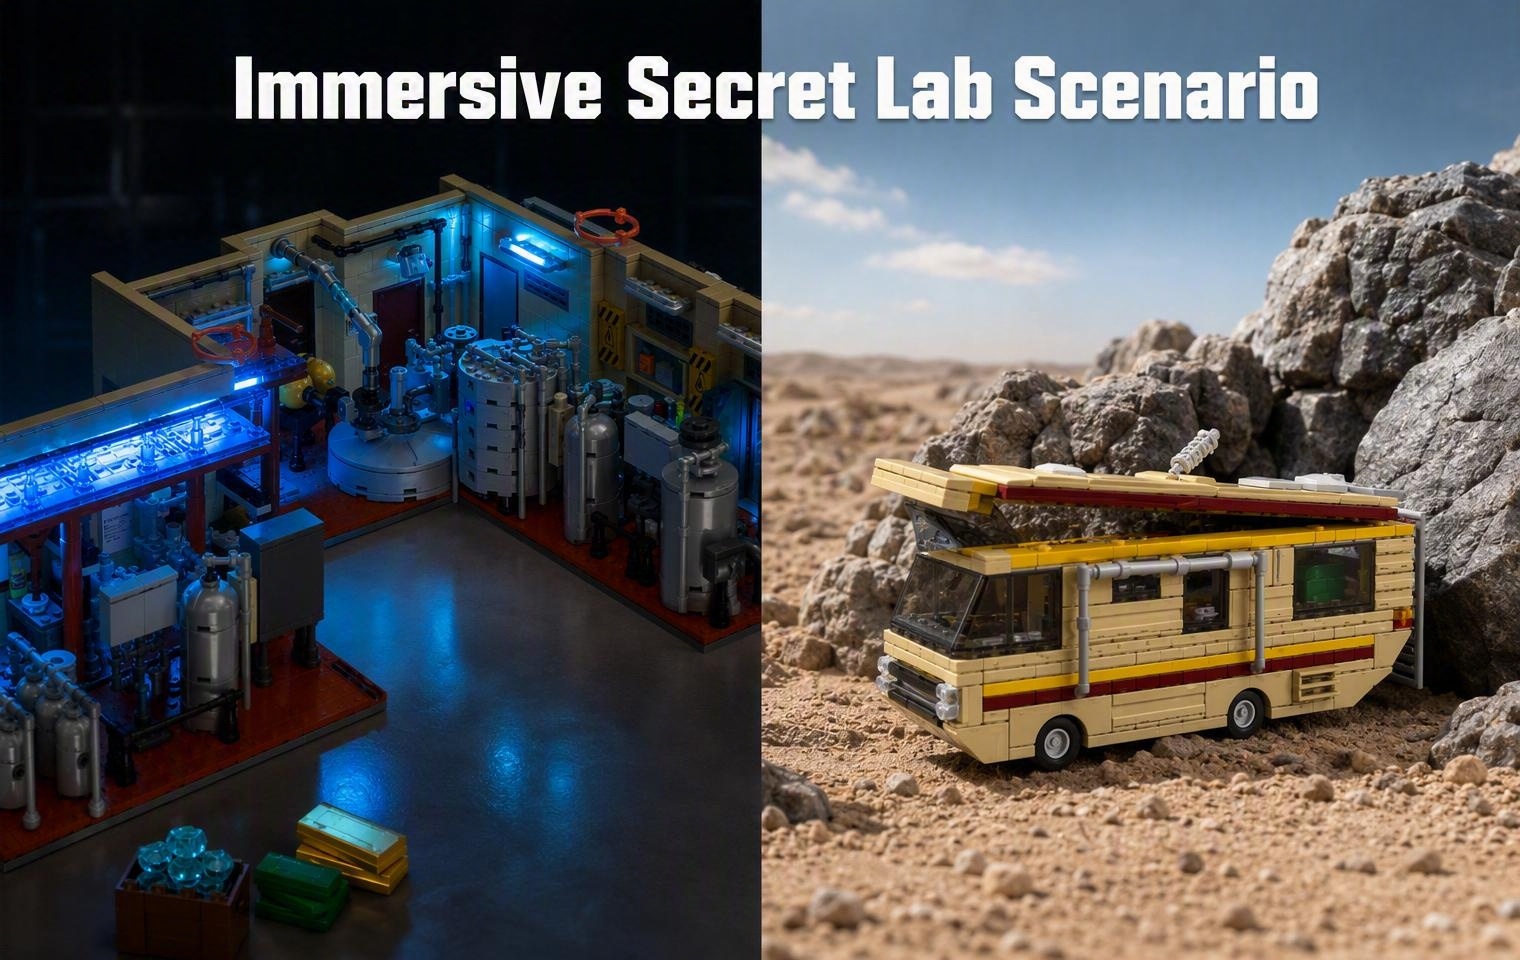
The blue LED cold-storage room is a focal point, not the only light source the Catalyst Laboratory needs. Combine that internal blue accent with soft external light so the reaction tank, controls, pipework, foldable modules, and separate camper van remain visible in photos.
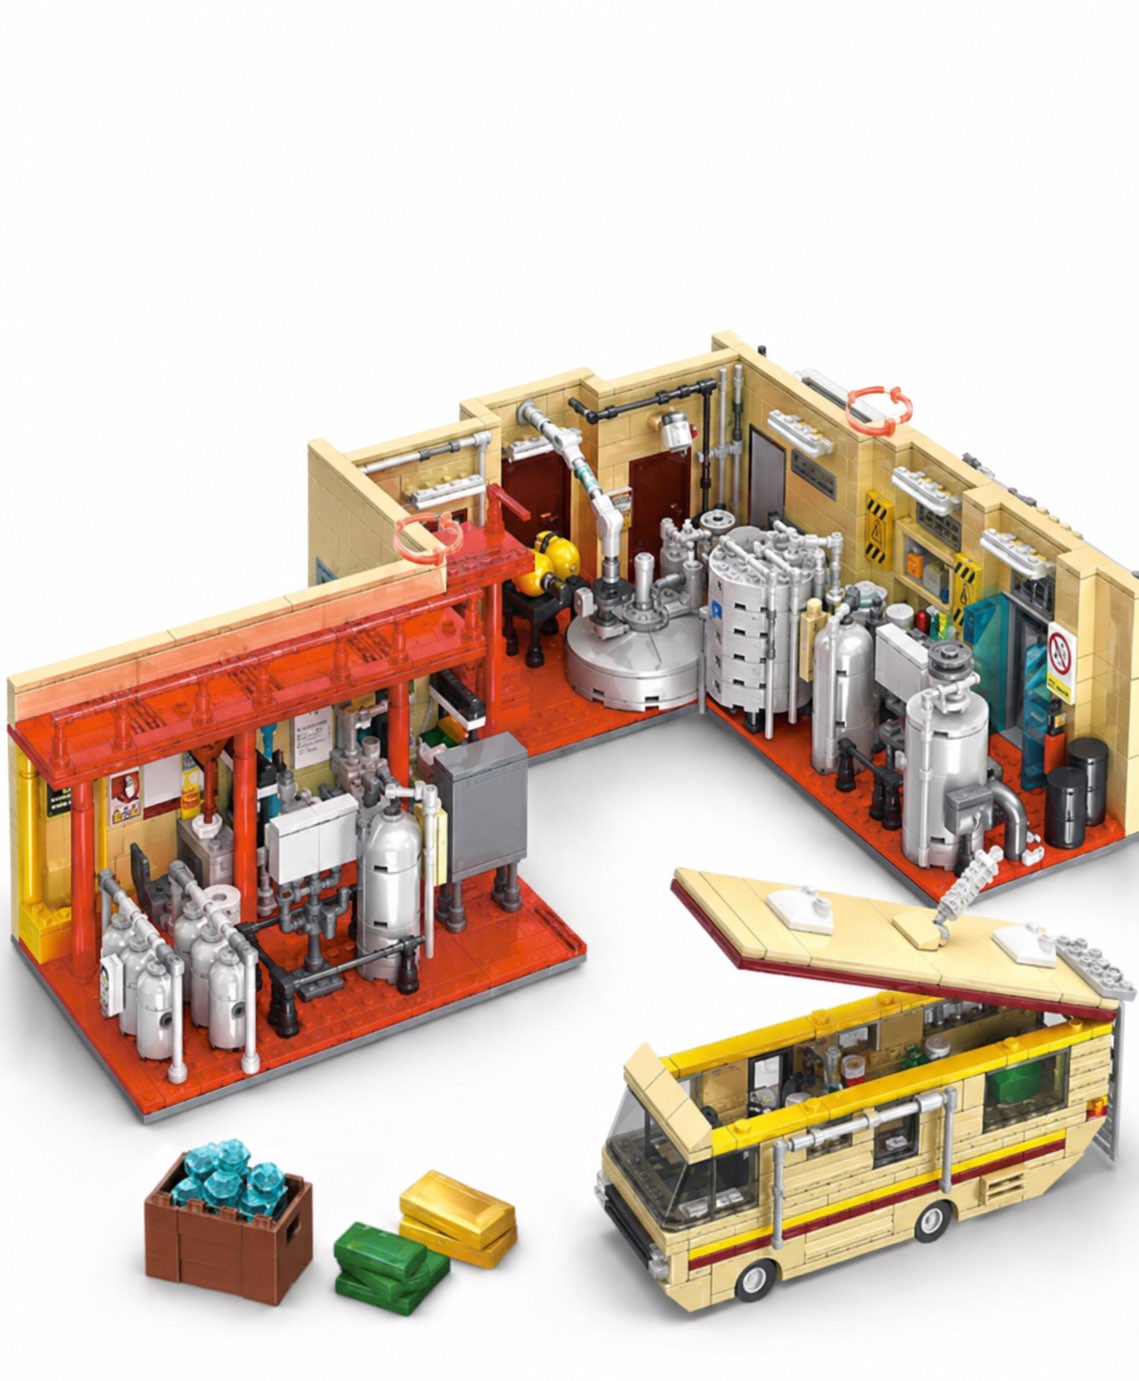
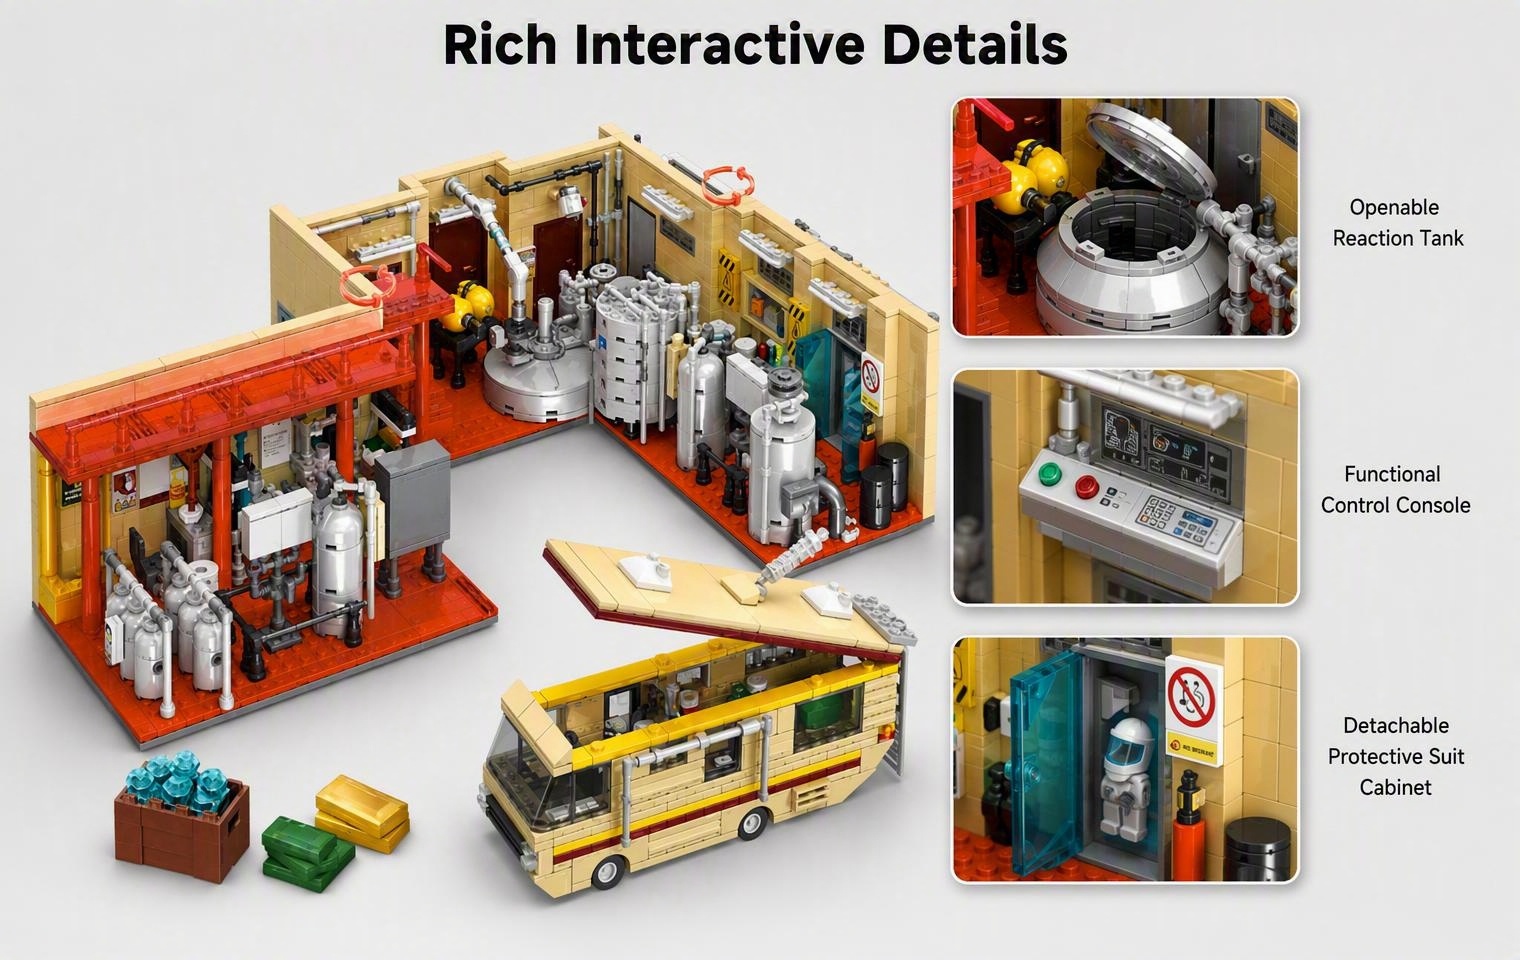
The current Catalyst Laboratory Building Set with LED contains 1,471 ABS pieces and is recommended for ages 12+. Its listed features include blue LED cold storage, hinged laboratory sections, an openable reaction tank, monitoring controls, gas equipment, a cleaning station, and a removable-roof desert camper van.
- Use the included blue LED as a scene accent.
- Add one soft neutral light to reveal the model's structure.
- Reflect light into deep interior zones instead of aiming a harsh lamp at them.
- Photograph the expanded lab, folded layout, reaction tank, LED room, and camper van separately.
Prepare the Laboratory Before Turning on the Light
Complete the model according to the printed manual and place it on a level surface. Check the hinged sections, overhead truss, pipes, reaction tank, controls, and loose accessories. Move the camper van to its own stable position and remove its roof only when the base is supported.
- Clean the camera lens and the clear LED-room panels.
- Remove unrelated objects from behind the model.
- Choose expanded or folded mode before arranging lights.
- Route the included light component only as shown by the product instructions.
- Use a tripod, phone stand, or stable support if available.
Build a Two-Light Look With One LED Accent
Internal accent
Turn on the included blue LED in the transparent cold-storage area. It creates the cool focal point and helps identify that module in a wide image.
External key light
Place a diffused neutral lamp above and about 45 degrees to the front. Its job is to show the tan structures, controls, tanks, pipes, and van without overpowering the LED.
If the shadow side becomes too dark, use white card or paper outside the frame as a reflector. Move the card closer for more fill. Avoid adding a second hard lamp that produces several competing shadows across the pipework.
Control Reflections in the Cold-Storage Room
Transparent panels can reflect the lamp and phone. Change the camera angle a few degrees before changing the light. A slightly higher or lower viewpoint often removes the bright reflection while preserving the blue glow.
Keep the room dark enough to see the LED but not so dark that the rest of the laboratory disappears. Use the phone's exposure control to protect the brightest blue area, then add reflected light to the structure if needed.
Use an Eight-Image Shot List
- Expanded overview: show the full 23.6-inch laboratory width and separate camper van.
- Folded overview: photograph the compact configuration from the same camera height.
- Blue cold-storage room: expose for the LED and keep the transparent walls visible.
- Reaction tank: show the openable feature with nearby controls and pipes.
- Workstation: include the bench, bottles, cabinets, and utility area.
- Camper exterior: photograph the beige body and red-orange stripes with the roof in place.
- Camper interior: remove the roof and show the miniature lab-style workspace.
- Parts and manual: record the included components and printed instructions before storage.
Use a consistent camera height for the two overview images. This makes the footprint change between expanded and folded layouts easy to understand.
Photograph the Camper Van as a Second Subject
The included camper van is a separate model, so it deserves its own lighting position. First photograph the roof-on exterior at vehicle height. Then support the base, remove the roof, and move the soft light slightly forward so it reaches the bottles, storage details, equipment, and lab-style bench.
Do not place the van directly in front of the blue LED for every image. That arrangement can turn the vehicle into a dark silhouette. Use the LED room as background context in one scene, then photograph the van independently for clear detail.
Pick a Background That Separates the Equipment
Neutral gray
A medium gray background keeps the blue LED saturated and separates beige, white, and dark technical pieces.
Deep navy
Navy supports a cinematic night-lab look, but add enough neutral key light to preserve the black and dark-gray details.
Warm sand
A muted sand background connects the laboratory to the striped desert van. Keep it darker than the lightest model pieces.
Clean white
White works for inventory photos. Reduce reflections on transparent pieces and watch for pale parts blending into the background.
Edit for Accuracy, Not Artificial Effects
Crop the image, straighten the shelf line, and make small exposure or white-balance adjustments. Avoid changing the blue LED color, removing structural parts, or exaggerating brightness beyond what the model produced. Accurate photos help readers understand the real layout and included feature.
Export a wide overview for banners and a square crop for listings. Keep the original files so later crops do not require repeated handling of the model.
Lighting and Display Safety
Follow the printed instructions supplied with the set and use the LED component only as directed. Keep the model and lighting away from water, heat, and unstable shelf edges. The product page states that this is a decorative building model, not a real or functional chemistry laboratory.
The listing recommends ages 12+ and warns that the set contains small parts. Keep loose elements away from young children.
Catalyst Laboratory Photography Questions
Is the blue LED included?
Yes. The current listing identifies a blue LED cold-storage light as an included feature.
Can the laboratory be photographed folded?
Yes. The hinged modules support both a wide expanded scene and a compact folded display.
Does the van roof come off?
Yes. The separate camper van has a removable roof that reveals a miniature lab-style interior.
Is the set officially licensed?
No. The product page describes it as a fan-inspired independent model with no television studio, franchise, or brick-brand endorsement.
Let the Blue LED Lead, Not Hide, the Scene
Set the laboratory layout first, add one soft neutral light, and use the eight-image shot list to document the full model and its key modules.
Product details were checked on October 8, 2026. Specifications, packaging, lighting components, images, and availability may change. Follow the printed instructions and safety guidance supplied with the actual set.