
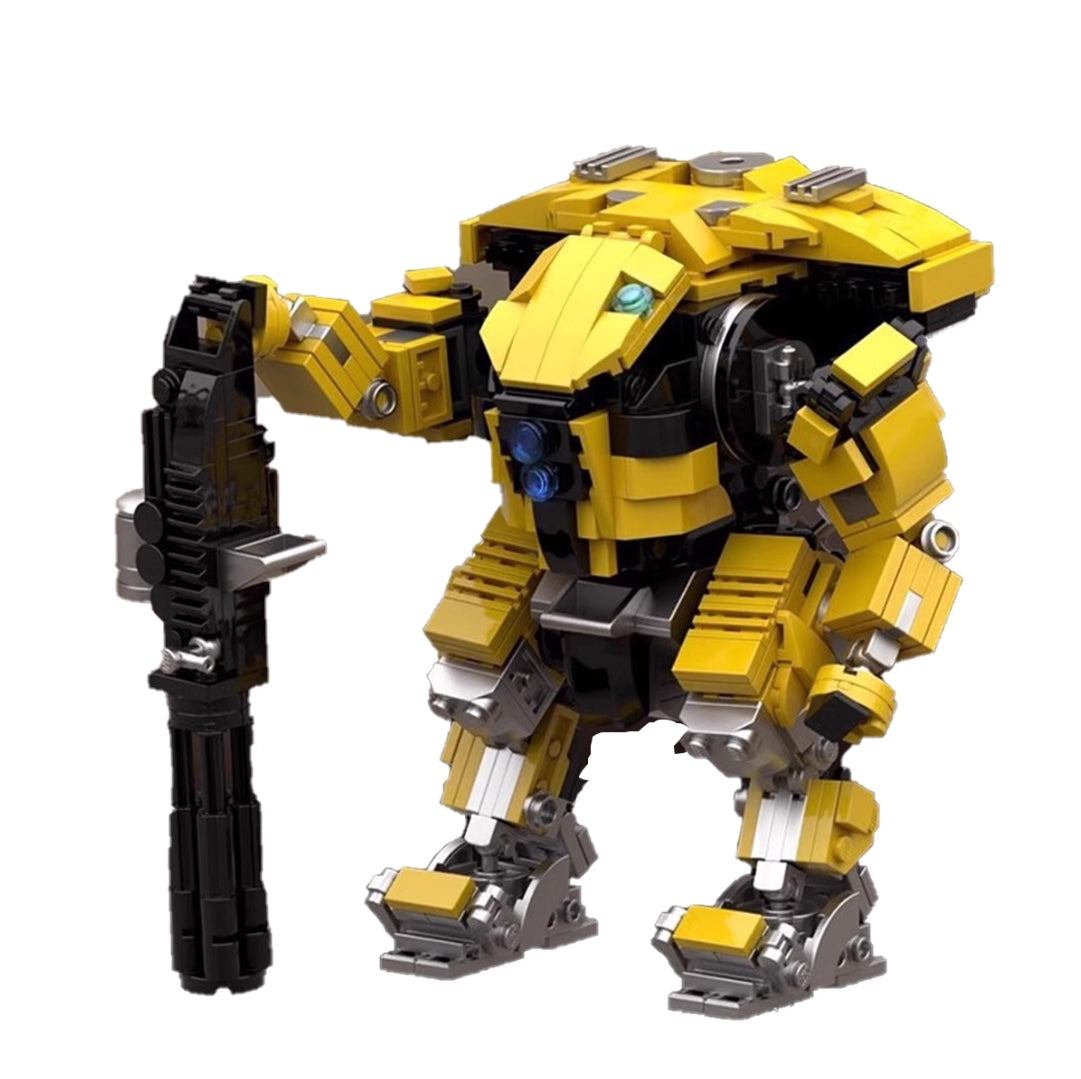
A 515-piece Legion Prime build does not require a hobby room, but it does benefit from a disciplined small-desk layout. The key is to separate unopened parts, the active stage, and completed modules so the yellow armor, dark frame, and long cannon elements never compete for the same space.
This plan is based on the current Legion Prime-inspired mech listing, which describes approximately 515 self-locking ABS pieces, a yellow-and-dark color scheme, a brick-built cannon, and age guidance over 12. It is a workspace guide, not a hands-on product review.
- Use three fixed zones instead of spreading every part across the table.
- Open only the parts needed for the current stage.
- Keep mirrored sections and cannon elements in separate trays.
- Store the project in a covered pause box before the desk returns to daily use.
Before You Begin: Clear Only the Space You Can Protect
Choose a firm desk where the project can remain undisturbed during a session. If the same surface is used for work, school, or gaming, prepare a lidded container large enough for trays and unfinished modules. The goal is not to occupy the whole desk. It is to create a repeatable layout that can be packed away without mixing stages.
Supply
Keep sealed or unopened groups at the back or in a side container. Preserve their original order.
Active build
Reserve the center for the instruction, current tray, and module in hand. Nothing unrelated enters this zone.
Completed parts
Place finished limbs, armor sections, and cannon modules on a soft mat away from the desk edge.
Step 1: Sort by Function Before Fine Detail
Begin with broad groups that support the model's structure. Separate larger dark frame pieces, yellow exterior panels, small connectors, and unusual cannon elements. Avoid creating dozens of tiny categories that consume more desk space than they save.
- Keep unopened groups in the supply zone.
- Move one active group into two or three shallow trays.
- Put very small connectors in a container with raised sides.
- Leave distinctive long or angled cannon pieces by themselves.
A good sort lets you scan a tray in seconds while preserving the relationship between the parts and the current instruction stage.
Step 2: Build the Dark Frame as a Reference
The dark mechanical frame gives later yellow armor a clear attachment context. Work on one central or structural module at a time, checking connector direction before adding decorative panels. When two parts look nearly identical, compare connection points and length rather than relying on color alone.
For a fuller module-by-module sequence, the store's general mecha build guide explains how to verify frames, limbs, armor, and equipment without losing the instruction position.
Step 3: Pair Mirrored Limbs Without Mixing Them
Build mirrored sections on separate sides of the active zone. A left tray and right tray prevent similar connectors from crossing over. Before attachment, place the two modules side by side and compare their orientation from the front, rear, and connection face.

Step 4: Add Yellow Armor in Checkpoint Groups
Exterior panels make the model recognizable, but they can also hide internal connections. Add armor in small groups, then stop and inspect the frame before closing another area. Photograph the front and side after each major group so you have a record of alignment.
- Collect only the panels shown for the current step.
- Confirm the supporting connection before pressing the panel into place.
- Check that the panel does not force a limb or joint out of position.
- Return leftover pieces to the stage tray, not a general pile.
Step 5: Protect the Cannon as a Separate Module
The large black cannon is a focal point and may extend beyond the compact body footprint. Assemble it on the cleared active zone, then store it parallel to the back edge of the desk or in a dedicated container until the body is ready. Do not leave it across a keyboard, cable path, or frequently used corner.
Attach the cannon only after the mech can stand in a stable neutral position. Recheck both feet and the torso after adding the accessory because the visual and physical balance may change.
Step 6: Pack a Reliable Pause Box
If the desk must return to daily use, finish the current instruction step before packing. Record the step number, photograph the active module, close every tray, and keep completed sections separated with soft dividers.
Label before closing
Write the current step, active group, and next action on one note placed at the top of the box.
Restart before opening
Compare the saved photo with the instruction and physical module before adding new parts.
Move From Build Desk to Display Shelf
The listing does not provide a finished size in its current specification block, so measure the assembled model before buying a fitted case or assigning a tight shelf. Include the cannon in the width and depth check, then leave extra clearance around the feet and projecting elements.

Use the existing mecha display guide for neutral posing, shelf clearance, and lighting. If you want a larger Legion Prime project, compare the 665-piece Legion Prime Titan set and confirm its different instruction and package details.
Common Small-Desk Mistakes
Opening every group
This removes stage information and fills the surface. Open only what the current instructions require.
Using deep bowls
Small parts hide beneath larger elements. Shallow trays provide faster visual scanning.
Building beside active cables
A charging cable or mouse cord can catch a module. Route daily-use cables outside the build zone.
Attaching the cannon too early
A long accessory makes the model harder to rotate. Keep it separate until the body stands securely.
Plan the Desk Before Opening the 515 Pieces
Review the current product images and specifications, then prepare three compact zones for a cleaner build and safer pause routine.
View the 515-piece Legion Prime setBrowse Mecha & Sci-Fi sets
Product details were checked on October 5, 2026. Piece count, specifications, images, packaging, and availability may change. Follow the instructions and safety guidance supplied with the actual set.