
The desert RV model has two clear display identities: a closed, striped vehicle silhouette and an open-side mobile-lab scene. Choose the viewing mode first, then size the shelf, background, and lighting around that choice.
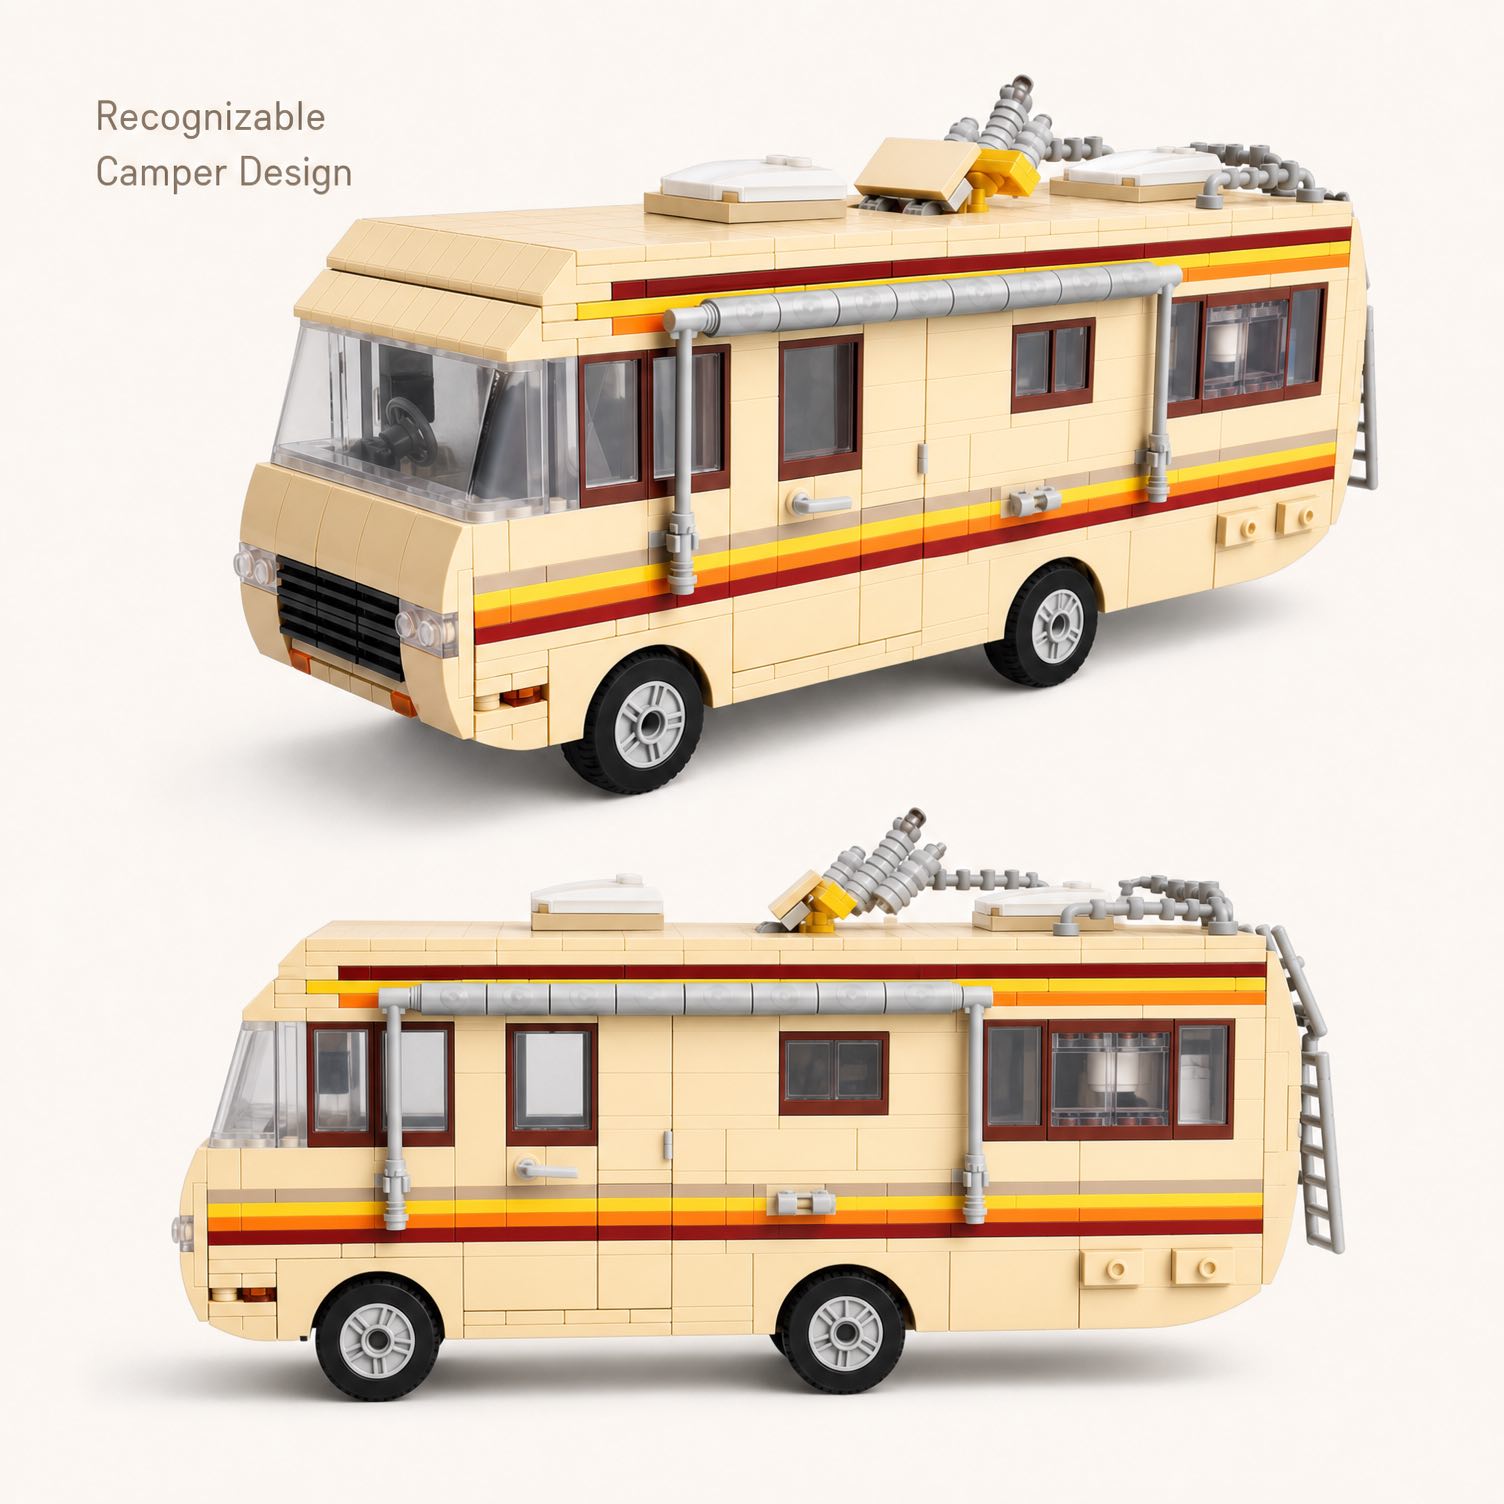
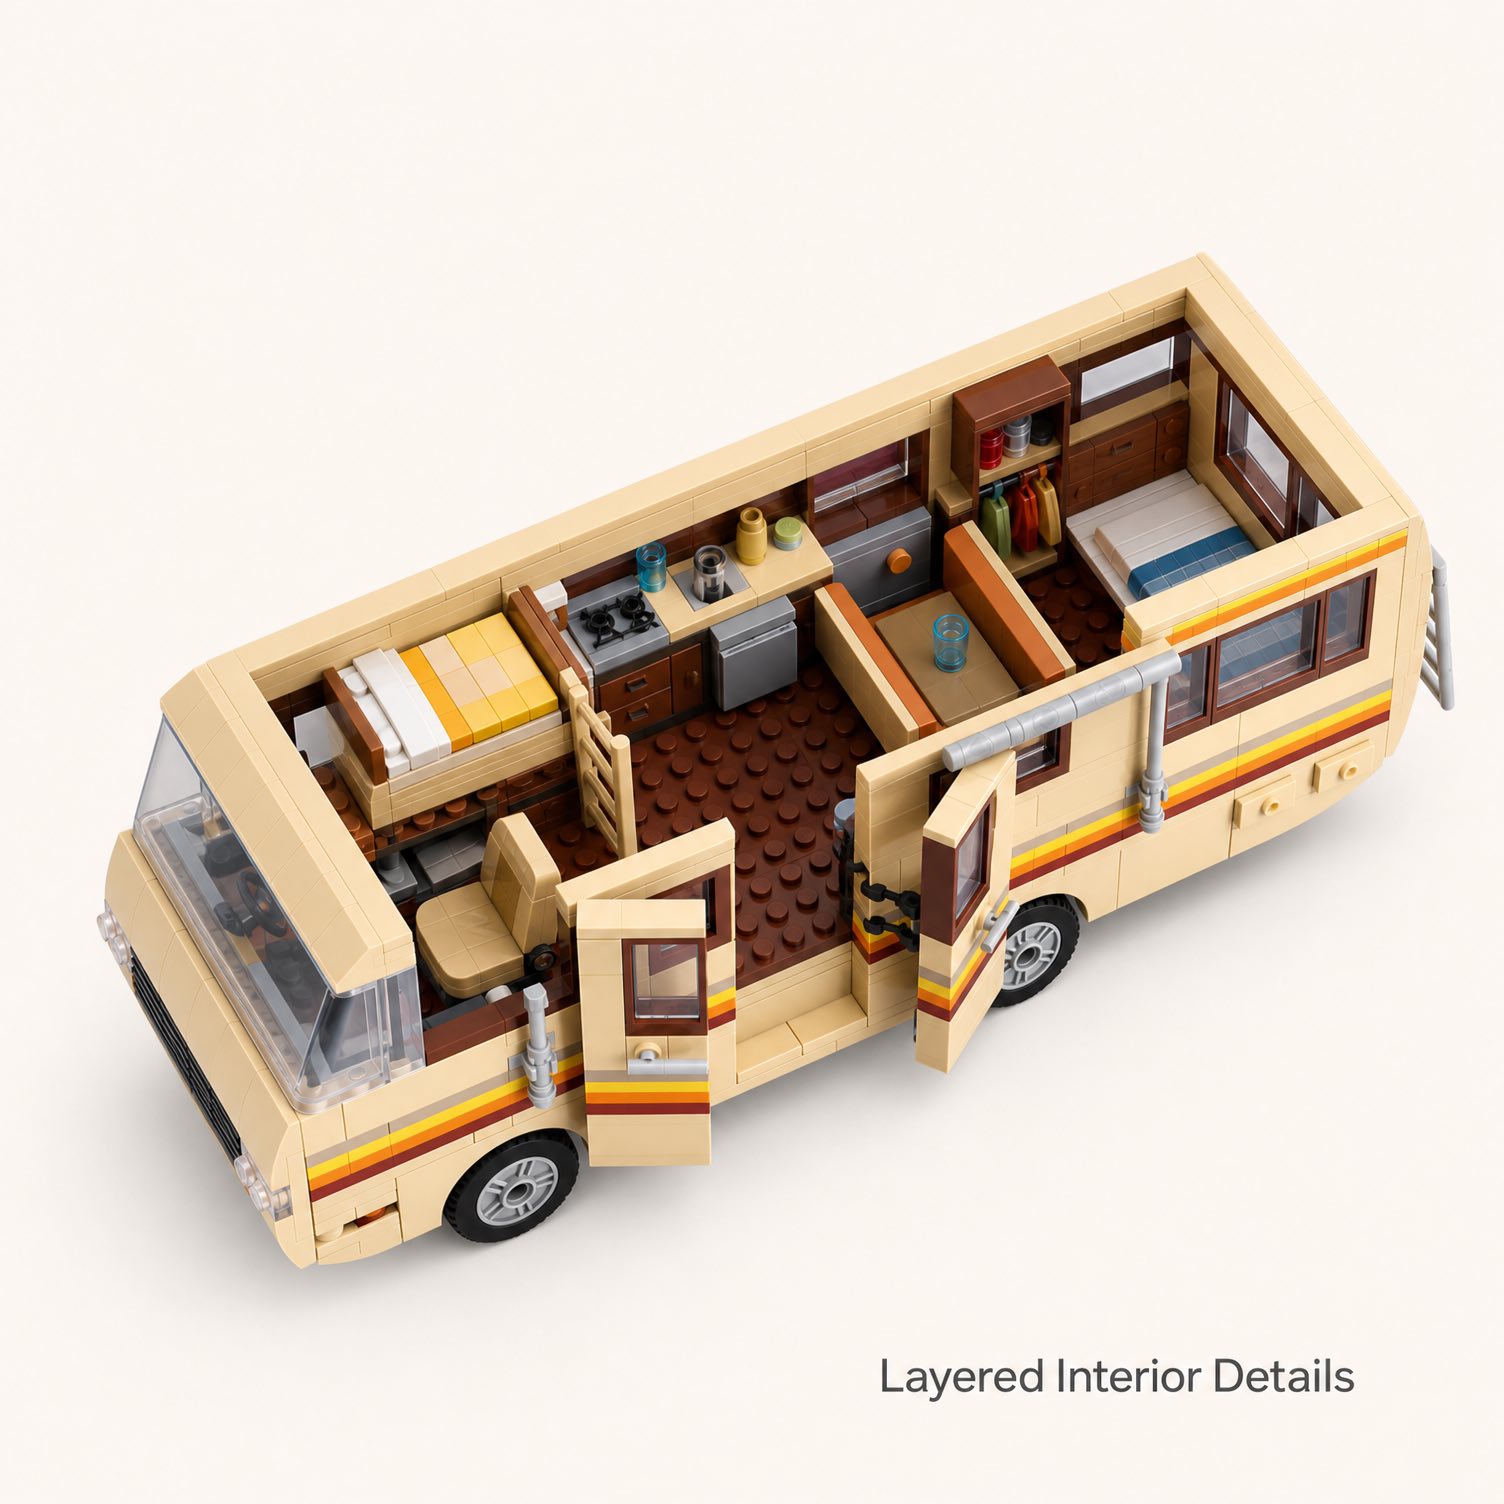
The current Desert RV Camper Van Building Set lists a finished size of about 11 × 3.2 × 4.1 inches. Its beige-yellow body, three-color stripes, dark windows, roof vents, skylight elements, exhaust pipe, and opening interior give collectors several useful viewing angles.
- Use the closed mode for a clean vehicle profile and narrow shelf footprint.
- Use the open mode for close viewing of the laboratory and living-area details.
- Use a front three-quarter angle when only one view is available.
- Leave clearance above the roof equipment and beside the opening panel.
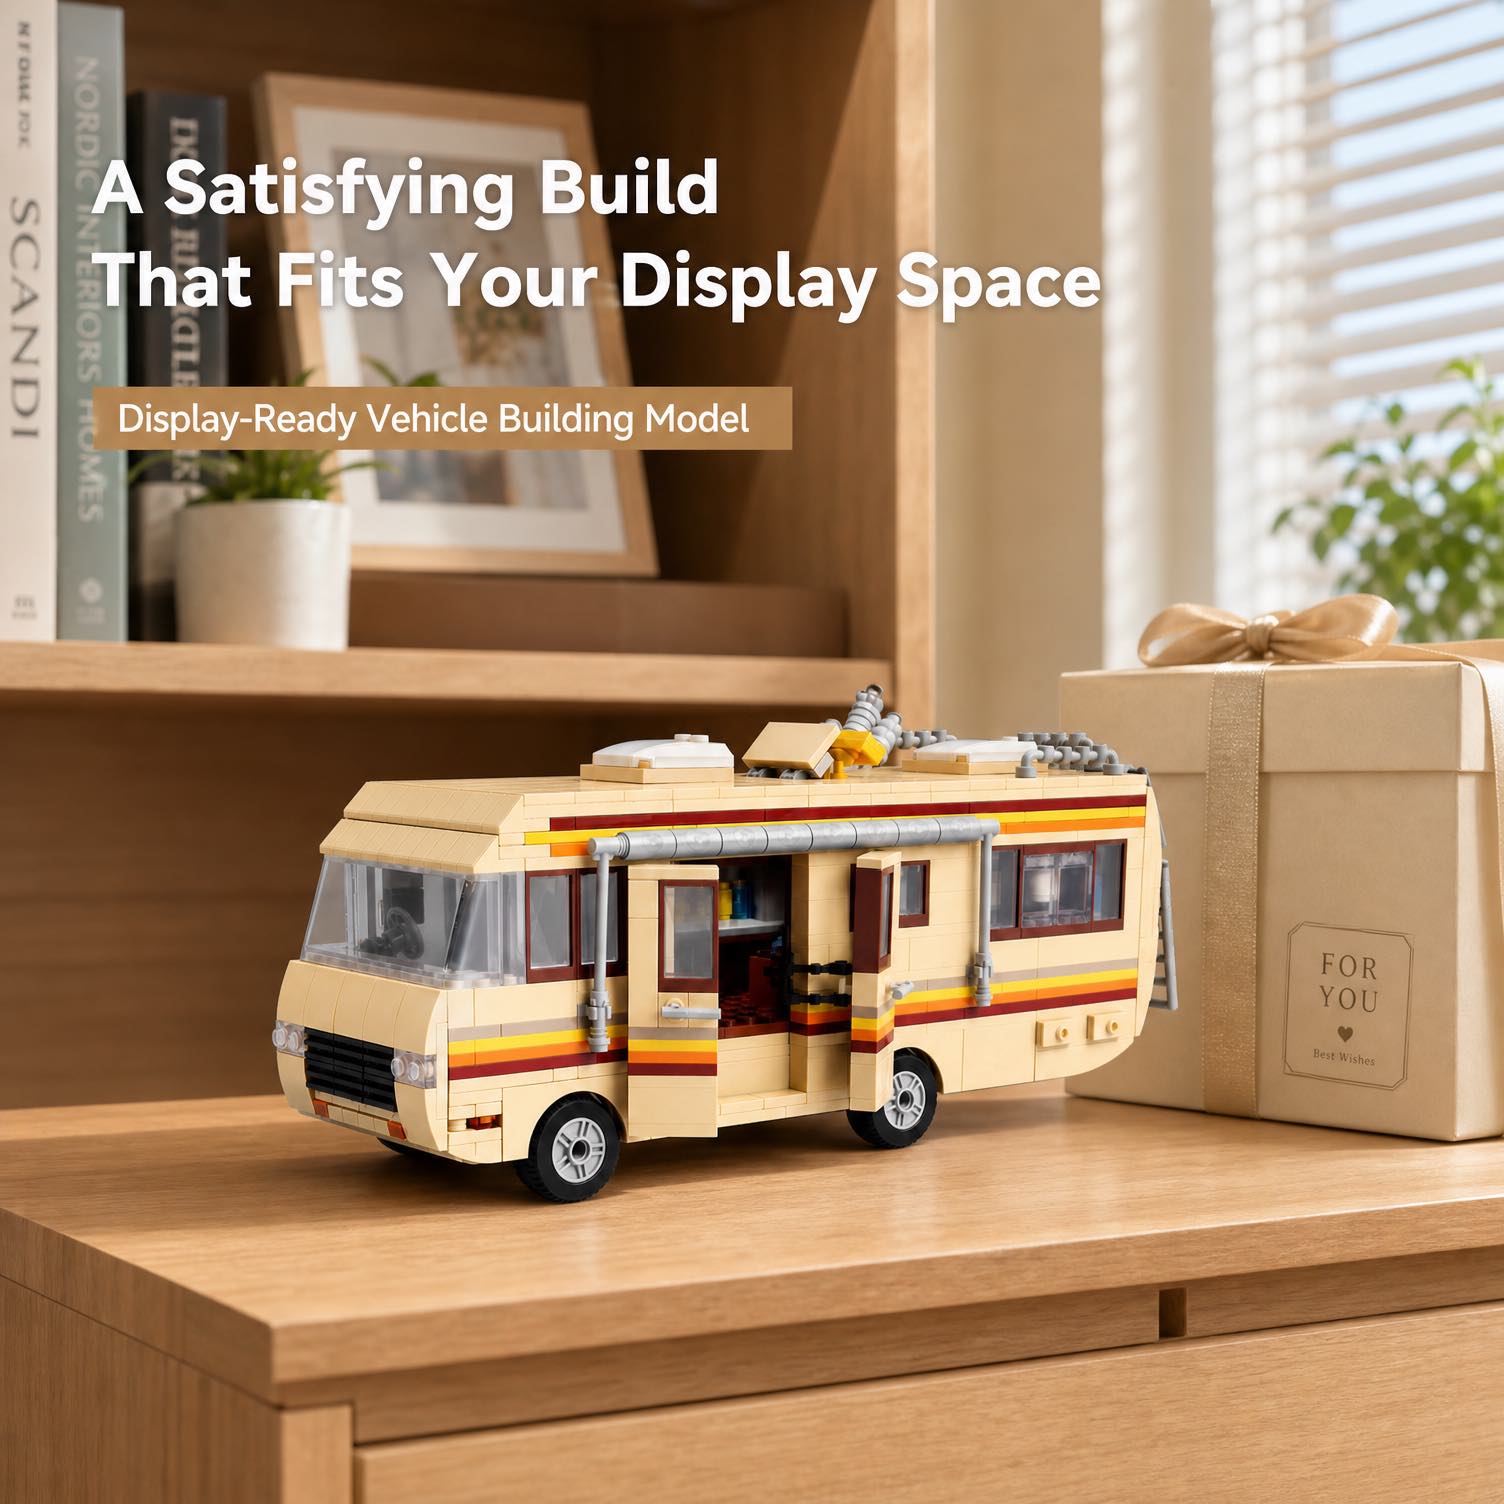
Closed or Open: Which Display Mode Fits the Space?
Choose this mode for a bookshelf, vehicle collection, or view from across the room. The continuous red, orange, and yellow stripe becomes the main graphic feature, and the body stays close to the listed 3.2-inch width.
Choose this mode for a desk, close cabinet, or photography setup. The interior equipment and compact living details become visible, but the display needs extra side clearance and a viewing angle that looks into the opening.
If the model will alternate between modes, mark its base position on the shelf with removable tabs. You can reopen the side without repeatedly sliding the entire vehicle.
Measure the Shelf Beyond the Listed Dimensions
The published measurements describe the completed RV, not the handling clearance around it. Add space at the front or side for your fingers, room above the roof equipment, and clearance for the opening panel. Confirm the actual finished model before ordering a fitted acrylic case.
Desk
Keep the RV outside mouse, keyboard, drink, and cable movement. Open the side toward the seated viewer.
Bookshelf
Place the closed side near the edge of the sight line. Leave enough depth that no roof or rear detail protrudes.
Display cabinet
Test door clearance and reflections. A slight diagonal position can show the front, stripe, and open interior together.
Choose a Background for the Beige and Stripe Colors
A medium charcoal, muted blue, or dusty green background separates the beige-yellow body from the shelf. A bright white background can make the lighter body edges disappear, while a highly patterned backdrop competes with the side stripe and roof details.
For a desert scene, use a plain sand-toned base with a darker vertical background. Avoid loose real sand near the connections. Paper, fabric, or a printed surface creates the look without introducing grit.
Light the Exterior and Interior Separately
Use a soft light from above and slightly in front of the model to show the roof and stripe. When the side is open, place a white card opposite the light to reflect brightness into the mobile-lab interior. Avoid placing a bare lamp directly behind the roof because it can turn the interior into shadow.
- Exterior photo: close the side and light along the stripe.
- Interior photo: open the section and move the reflector, not the model.
- Roof view: raise the camera slightly to reveal vents, skylight elements, and the exhaust pipe.
Capture a Six-Image RV Photo Set
- Closed front three-quarter: show the front, full side stripe, and roof profile.
- Closed side profile: keep the camera level with the center of the vehicle.
- Open side reveal: expose the interior without clipping the opened section.
- Interior close-up: focus on laboratory and living details.
- Roof detail: record vents, skylight elements, exhaust pipe, and accessories.
- Scale and footprint: photograph the RV on the intended desk or shelf.
Clean the phone lens, turn off digital zoom, and move closer instead. Use grid lines to keep the roof and shelf horizontal. Photograph closed and open modes from the same camera position for an easy comparison.
Pair the RV With the Larger Laboratory Scene
The related Catalyst Laboratory Building Set uses a foldable industrial lab and a separate camper van at a larger 1,471-piece scale. Displaying the standalone RV near that model can create a connected desert-laboratory theme, but check the visual scale and shelf depth before combining them.
Use the camper van building collection to compare other vehicle silhouettes and decide whether the RV should lead a vehicle row or anchor a story scene.
Protect the Opening Feature
Support the lower body whenever the model moves. The opening wall, roof vents, exhaust pipe, and accessories are display details, not handles. Dust with a clean soft brush and close the side before carrying the RV to a different room.
Desert RV Display Questions
Is the side designed to open?
Yes. The current listing describes an opening side section that reveals the mobile-lab-inspired interior.
How much shelf depth is required?
The closed model is listed at about 3.2 inches wide. Add handling clearance and more space if the side will remain open.
What is the best single viewing angle?
A front three-quarter view can show the front, stripe, roof profile, and part of the interior when the side is open.
Is it an officially licensed set?
No. The product page identifies it as an independent building block set with no studio or LEGO affiliation.
Choose the Display Mode Before Choosing the Shelf
Review the current exterior and interior photos, measure the intended space, and decide whether the finished RV will normally be open or closed.
Product details were checked on October 8, 2026. Specifications, packaging, images, and availability may change. Follow the instructions and safety guidance supplied with the actual set.